Shafted
It's August bank holiday Saturday, the RD250 race bike is ready for the dyno, strapped in the back and I am half way to the dyno when *BANG*. I loose drive and a low grinding noise tells me all is not well as I coste to a stop.
Fuck stick.
Some roadside deliberating got me thinking clutch but the padal felt fine and there wasn't any noise till I applied drive. A bit of forum bashing (it was a bank holiday so I had a while to wait) later and drive shaft kept coming up again and again.
Once the AA guy rocked up he was convinced the duel mass flywheel had gone, hitched me up and towed me home.
The van sat nicely on 100,200 miles and a duel mass flywheel being rated for 100,000 did make it the prime suspect. A blown clutch was one thing but the duel mass was going to make things expensive.
A bit of internet shopping had me looking around the £500 mark for the parts. The job shouldn't be out of my abilities and tooling wise I shouldn't be far off so I had a look through the Haynes manual. To get to the clutch the gearbox needs to come out, to get that out the drive shafts, engine subframe, front engine mount, DPF and a few other bits needed removing or displacing too. Joy.
Seeing as I would be waiting for parts due to the bank holiday I decided to make a start on things before ordering anything just yet.
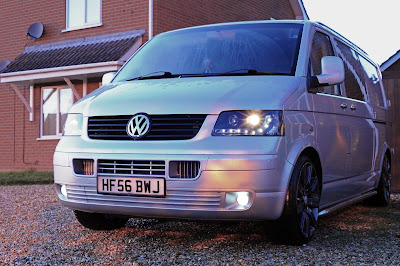
The van was pushed off the gravel drive onto some slightly more stable paving slabs at the front of the house. the concrete down the side would have been nicer but there was no way I was going to push the van down there!
I jacked the van up and stuck axle stands on the engine subframe, wondering where I might put them later when this part would need removing.
Once up I spun the off side front wheel which rumbled away whilst the near side wheel twitched occasionally but was otherwise stationary. This seemed odd so I spun the nearside wheel which spun freely yet the offside did nothing. Interesting.
I was now starting to think I might have been right in the first place and seeing as the drive shaft had to come out anyway I skipped to that step.

Onto the drive shaft
I won't go blow by blow with this as the haynes manual does a fairly good job here but I will fill in some gaps and cover some differences in what I did.
Off came the wheels and the belly pan which contained some ominous debris from under the clutch bell housing.
next up I refitted a wheel nut into the disc, braced it using a tire iron and removed the shaft nut with a rattly gun. This came off with no fuss at all.
Next off came the ball joint nut so the strut could be manipulated out of the way so the shaft end could be withdrawn with the aid of a hide faced hammer.
There are two bolts holding the intermediate universal joint to the chassis that need to come off then the shaft is simply removed with the aid of some swearing and a hammer.


What I found was a completely stripped
Judging by the rusty goo in the area it looks like water had got in here and caused the teeth to wear much like many other owners vans had done. Mind you at 100k miles I couldn't be too upset about it. Also looking on line this was going to cost me a lot less in spares and time when it came to fitting a new part.
A replacement drive shaft was ordered after a good bit of internet hunting. The price was good anyway and it claimed to come with a stub shaft too although this turned out to be false.


Whilst I was here and parts would be a few days, I decided to give everything a good clean and a dusting of paint here and there.
The calipers had been on the cards for months since I painted the dics and after a very thorough clean I masked them up and painted them in situe. I didn't bother masking the disc as:
1. I wanted the edge painted anyway.
2. the rest would rub off when I finally got to drive the van again.
Everything else got painted gloss black for protection and a paint pen was used for the caliper lettering. Nobody will see it but I will know it's there.

Fast forward a few days and a DPD van reversed onto my drive.
"I like the way you hold my shaft" I said to the driver as he delivered my package, he looked back at me blankly.
My humor is wasted on some people.
The pattern shaft looked to be of good quality and despite the stub shaft being missing I was happy.
The van was already cleaned and ready to take the new shaft.
I greased both ends liberally and cleaned the stub shaft that I had not planned to reuse. It would do the job till I got round to replacing it in the future.
As well as the splines I also greased the inside of the plastic boot on the inside end of the shaft and the tapered end that sits on the hub to further add protection from the elements.
I used a high temperature lithium grease which is low fling, good with varied temperatures and should help keep the water out.

The torque did not lend these to be stretch bolts and so far as I could see the only reason to replace was the thread lock.
So I put some new thread lock on them and torqued them up.

The rattle gun did a great job of drawing the shaft into the hub saving a lot of fighting it with a ratchet.
Aside from wheel fit and belly pan that was the job done. I gingerly test drove the van and found all to be well to my relief.
This is far from a tricky job and well within most peoples abilities. So apart from some inconvenience; a shaft failure isn't a big deal to sort out.


Comments
Post a Comment