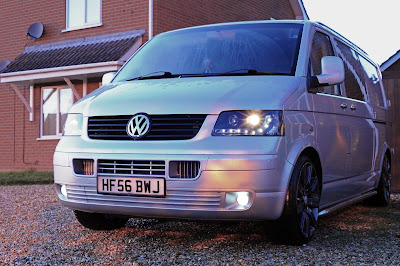
A Dash of music

Choices
The standard head unit on the T5 is a fairly uninspiring lump reminiscent of my first Audi's Concert II. It is admittedly functional and the previous owner had added a parrot blue tooth and ipod dock to spice things up. I do not own an ipod however and the parrot doesn't stream music so it was definitely stuck in the naughties.
There is a huge collection of after market head unit options available for this van requiring some serious review reading to pick out a winner.
I was keen to keep the OEM look which was somewhat restricting me unless I went for the new shape centre console which would allow me an RNS510. Changing the centre console opened up a quite a few more options including the Kenwood DNX520 which not only offered even more features than the RNS510 and better navigation, it was also designed to work specifically with VW's unlike most other aftermarket head units.
I read a mixed bag of reviews for this and the later 521 complaining about poor performance. I was however getting a better vibe coming from the slightly newer DNX525DAB.
A bit of hunting and a chance encounter with a low priced DNX 525 on ebay (nearly new form a shop display), I started looking for all of the other bits I might need to get it to fit.
The Dash
As the DNX525 is a new shape head unit with the rounded corners I was going to need a centre console face plate out of a T5.1.
To achieve this you also need the top tray as it is slightly higher in the middle and the two vents are slightly different too. All told I could get these parts new for £250, which is allot when you forget you are dealing with a transporter. Luckily I spotted a complete dash for sale near me for £200, a no brainer that!
To achieve this you also need the top tray as it is slightly higher in the middle and the two vents are slightly different too. All told I could get these parts new for £250, which is allot when you forget you are dealing with a transporter. Luckily I spotted a complete dash for sale near me for £200, a no brainer that!
A quick Fit
Tear it out
Taking the old head unit out is fairly easy. I just popped the top tray out and the face plate off. There should be three fasteners under the top tray holding the face plate on but they were missing on mine. This way it drags the head unit out with it as that was only slotted in as well.
Now with all of the aforementioned add on's there was quite allot of wire hiding in here and round under the glovebox which also needed removing. Luckily most of this was fitted with slave in plugs so there was not much iffy connectors or soldering.
There were two cables that seemed to connect to nothing and dissapear up into the roof lining. I later figured that these were for rear speakers that were never fitted. Another oddity of this van is its reversing camera with a little screen in the glove box. This gained power from the reverse light but otherwise just used standard plugs. I opted to leave the camera for now and just remove the screen and power supply.
The other bit that needs to come out, well bits, are the vents. They basically unclip and pull out which is nice and easy.
Two additional parts were the GPS and DAB aerials. These were chased along the dash beam under the glove box and up to their new homes. The GPS needs to be in a clear spot on the dash and the DAB up on the top left of the windscreen, chased up the pillar. Both of these were stuck in place with adhesive strips supplied and the instructions that came with them were very clear on what to do. I didn't need to fit a mic as I already had one fitted from the parrot with the same plug.
Next in went the head unit using the CAN adapter cable supplied. The unit promptly buzzed to life but went no further than some lights, a fan and a blank screen.
 Faffing with cable and checking fuses brought me no joy. I checked all the packaging and everything was correct for the DNX525DAB and my van but then I spotted the issue. The head unit itself was a DNX521.
I checked the box again which said 525, the advert said the same and now I had a dilemma.
The seller was suspicious at first but after I spotted that the sponsor logos on the bottom of the screen are different on the 525 to the 521 and that his auction picture clearly showed a 521 he took it back for a full refund and took the loss on the aerials that I would have destroyed removing.
Back in went the old headunit and back to square one I went with it.
Now with all of the aforementioned add on's there was quite allot of wire hiding in here and round under the glovebox which also needed removing. Luckily most of this was fitted with slave in plugs so there was not much iffy connectors or soldering.
There were two cables that seemed to connect to nothing and dissapear up into the roof lining. I later figured that these were for rear speakers that were never fitted. Another oddity of this van is its reversing camera with a little screen in the glove box. This gained power from the reverse light but otherwise just used standard plugs. I opted to leave the camera for now and just remove the screen and power supply.
The other bit that needs to come out, well bits, are the vents. They basically unclip and pull out which is nice and easy.
Slam it in
Now I was ready to fit the new stuff in the reverse order. The vents went in and promptly fell back out again. On closer inspection the lugs that locate the vents into place are offset on the new ones whereas they are parallel on the old. This makes fitting them a bit fiddly and they aren't very secure. Not ideal.Two additional parts were the GPS and DAB aerials. These were chased along the dash beam under the glove box and up to their new homes. The GPS needs to be in a clear spot on the dash and the DAB up on the top left of the windscreen, chased up the pillar. Both of these were stuck in place with adhesive strips supplied and the instructions that came with them were very clear on what to do. I didn't need to fit a mic as I already had one fitted from the parrot with the same plug.
Next in went the head unit using the CAN adapter cable supplied. The unit promptly buzzed to life but went no further than some lights, a fan and a blank screen.
Bugger what had i got wrong?
 Faffing with cable and checking fuses brought me no joy. I checked all the packaging and everything was correct for the DNX525DAB and my van but then I spotted the issue. The head unit itself was a DNX521.
 I checked the box again which said 525, the advert said the same and now I had a dilemma.
The seller was suspicious at first but after I spotted that the sponsor logos on the bottom of the screen are different on the 525 to the 521 and that his auction picture clearly showed a 521 he took it back for a full refund and took the loss on the aerials that I would have destroyed removing.
Back in went the old headunit and back to square one I went with it.
More shopping
I decided to buy one of the German DNX525DAB's as the price was still pretty good and picked up a CAN cable from Absolute5 on the T4 forum who knew exactly what I needed and offered a very competitive price.
Now all I needed was some time to fit it all!
Dash out
I started this job off the back of another that I will write about soon. During fault invest I had quite a bit of the dash out already and thought "when in Rome" I'd just rip it all out whilst I'm here.
Far more easily said than done but I was taking my time, cleaning parts as I went so I missed allot of common mistakes that I was warned of.
There are a number of smaller panels on both footwells that need to come out to gain access to the gear shift panel. It is all fairly straightforward so long as you give yourself plenty of time and a good light source. It is worth mentioning you need two sizes of spline drive, a basic set of bits will do the trick as VW seem to like them over Philips heads like everyone else.
As access improves you can get to things like the cup holder and the little shelf with the hazard lights.

 You will also find as you remove a panel or two you will spot more underneath like the ones here which are either side of the steering column. These attach the main dash to the dashboard sub frame. Three other sneaky fellas are inside the centre console area that you can only see once the headunit, hazard light panel and air conditioning control have been removed.
The clocks also need to come out. There are two screws under the clocks and two plugs on the back. Not too tricky once you have half the van removed!

Two more fasteners are hidden under the pop off side panels on either side.
You can also see from this side image that the dash is lined up on two posts so even with all of the fasteners removed it will still feel like the dash is being held in place when given a light wiggle.
Wiggling is a great way to test if you have successfully removed all fasteners. The Haynes manual is of limited use here but dose offer a few hints.
I'd just say to remove everything you see then wiggle your way round till you find all of the ones you missed.
Once free the dash simply lifts out.
Naaa who am I kidding it is a right pain in the tits!
My suggestion here is; again take your time, take a break if the rage kicks in and remember what you did as you need to get that bugger back in later!
Dash replacement
Clearly by now it is dark, there is allot of crap all over the place and you are pretty sick of coffee but need it more than air!
 I wont bore you with the details as I already did that.
 The biggest problems I came up against were some slight differences in the donor van. The T5.1 clocks are a different shape and have the guide keys you can see on the right.
I opted to trim these back so the dash pushed home. The fit isn't great but after a few weeks of use I have gotten used to it. A clock change is on the cards later so a tidy up of this area is likely to happen in the future.
The other slight difference (not pictured) is a panel at the bottom of the centre console area where the air conditioning controls go. This just needed removing and my more basic dials plopped straight into place loosely. The posts for screwing it in didn't line up but the face plate clips onto the controls and hold them firmly when everything is fitted so this hasn't been a problem.
With the full T5.1 dash fitted I had no difficulty fitting the DNX525 and face plate.
I did need to buy an adapter for the fm aerial as for some reason it is different but as I haven't used it yet I need not have bothered.
On a later return I added a smaller loom that was in the box that required a wire splice to let the head unit know when the vehicle was reversing. I picked the wire up from the back of the fuse box and ran it up the back of the dash, the other wire is supposed to go the hand brake micro-switch but simply earthing it (I just found somewhere it would earth onto the dash subframe) which tricks the headunit into allowing video and satnav input on the move and saves me from splicing another cable!
Worth it?

Well it is pretty hard to justify the spend but I must say I have been making the most of it.
The extra DAB stations are a god send as I now get radio X and 6 music. USB music has been a great fallback and being able to stream spotify from my phone has also made journeys allot shorter!
The extra DAB stations are a god send as I now get radio X and 6 music. USB music has been a great fallback and being able to stream spotify from my phone has also made journeys allot shorter!
Oh and did I mention it looks cool too?

Speakers?

The biggest question you should be asking when fitting new audio equipment is "what is the sound quality like"?
Well it is superb as it happens. Even with the standard speakers it sounds good, really, really good in fact!
The reason for this was shown when I was later looking for why my windows had packed in and found these hidden under the door cards.
A nice set of Alpines pumping out crisp audio. Only the tweeters in the dash were original.
I have removed the wires heading to the back of the van as they were too short anyway. I will chase some new ones back there in the future and stick a couple of speakers in the back and a sub under the passenger seat. This will no doubt require an amp as well and there was those steering wheel buttons to get working as well...
So will be a little project for the future and no doubt another very, very long blog post.
Until then; what I have is a big improvement on stock and really improves the experience of driving the thing. :)


Comments
Post a Comment